
It was also a day full of Crooked Gap Farm food!
After I finished teaching school to our kids for the day, I spent the week before the event planning and preparing food for the 14 terrific individuals who were our guests, along with our family of 6.
Our Lunch was:
- CGF pulled pork sandwiches (on store bought buns)
- CGF tomatoes for the sandwiches
- CGF canned pickled banana peppers for the sandwiches
- CGF boiled potatoes, containing 3 different varieties of potatoes
- CGF buttercup squash
- CGF fresh cut carrots
- CGF watermelon
- Harvest Cookies containing a CGF heirloom pink banana pie squash and CGF "Run of the Farm" eggs

Our Supper was:
- CGF Beef and Vegetable Soup with the following ingredients from our farm : our heritage grass-fed Dexter beef, beef broth, carrots, onions, potatoes, summer squash, green beans, yellow wax beans, and sweet corn.
- CGF cut carrots
- Homemade rolls, made with CGF home rendered lard
- Strawberry Rhubarb Crisp made with CGF strawberries and CGF rhubarb
- "Pumpkin" pie, made with a CGF heirloom pink banana pie squash and CGF "Run of the Farm" eggs, as well as the pie crust being made with our CGF home rendered lard.

Over the summer I have tried to involve my kids in as much of our food preparation and preservation as possible, and this week of preparing for our class was going to be a very full week of cooking. I soon realized that that a lot of what I was cooking involved knives, cutting, and chopping, and I was having a hard time trying to figure out how to involve the kids rather than keep shuffling them away from my sharps.
One afternoon during the kids' rest and independent time, however, was my pie making afternoon. It was the perfect opportunity for me to teach some pie making skills to our 7 year old daughter so I pulled her away from her independent activities and had her come out to the kitchen.
One of the things that I tell my kids is that if you want to learn how to do something, watch first. After you have watched the process, ask any questions you have bouncing around in your head. Once you have done that, you may try it out.
I had 3 of my pumpkin pies to make so while I was mixing the dough, rolling out each crust, placing them in their pans, and putting on the finishing touches, Hannah watched on. I could tell how eagerly she wanted to help me with the pies, but she patiently watched as I finished up the first, and then the second, and then the third.
After I was completed, I balled up my remaining pie dough and told her it was her turn, much to her surprise.
I have a little six inch diameter pie glass that isn't good for much besides making mini pies with leftover pie dough. But, when you have a daughter, that reason is enough!
After all, my grandma taught my mom how to make pie crusts. My mom in turn taught me, which led to me winning 3 champion trophies when I entered my pies in the pie baking contests during my 4-H years. I still use that same recipe (which can be found on our farm's recipe blog), and I hope that Hannah will some day pass it down as well.
So after finishing my three pies, I began my kitchen clean up and let Hannah work on her pie crust all by herself. The only thing I helped her with was forming the ball of dough into a disk. She tried, but it took a little more muscle than she could muster. After that first step, I continued to clean up around the kitchen, pausing long enough to snap some pictures of her work.

Hannah paid careful attention to the dough as she rolled it out, being sure to keep her pie mat and rolling pin dusted just enough that it wouldn't stick to the mat or the rolling pin, rolling it out easily and gently. She did a good job not getting too much flour out either too, which would dry out the dough.

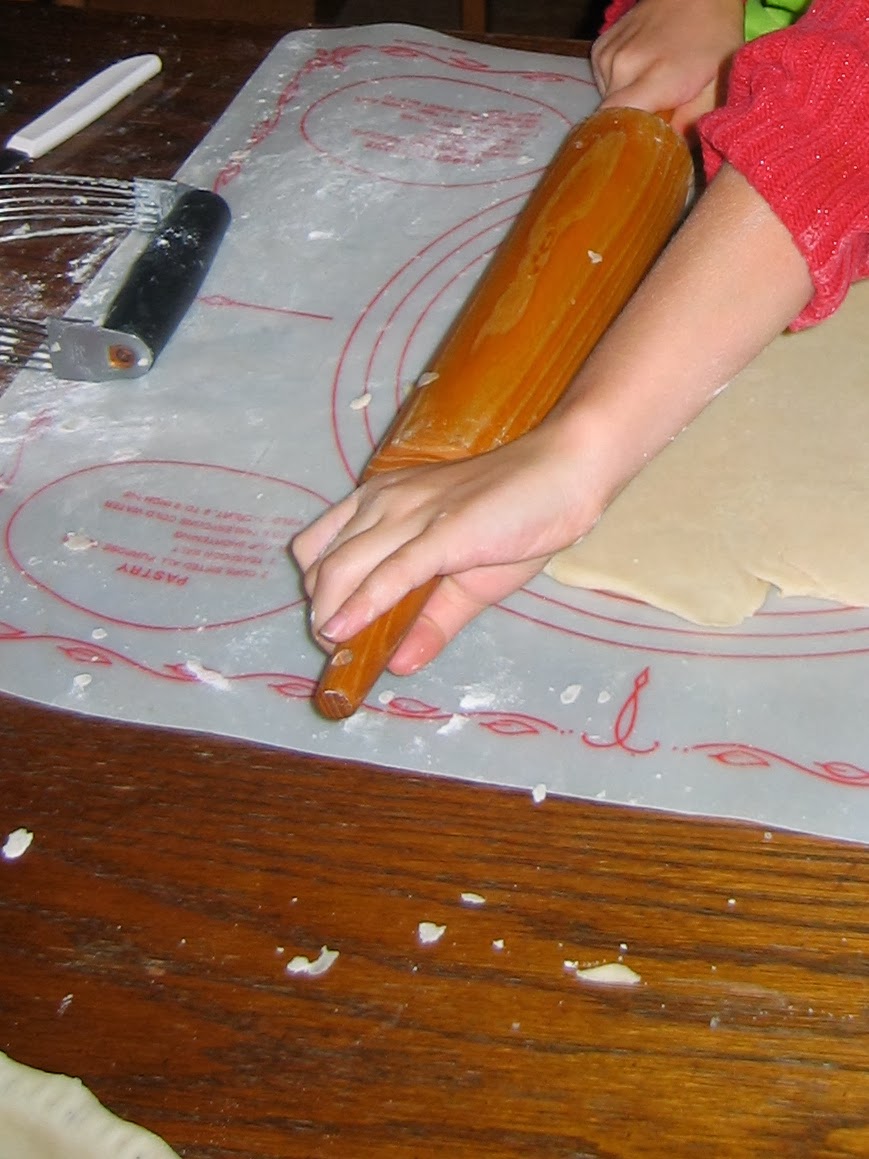


As you can see, there will still be a bit of pie dough scraps. These scraps are perfect for rolling out again to be cut into pie crust cookies, which can be brushed with milk and sprinkled with cinnamon and sugar. They are yummy to eat on their own or can be used to decorate your pies, as I did with my "pumpkin" pie.
As we talked about in our farm class, there are a lot of sacrifices that come with starting up a farm, especially when you are raising a family. Days are full, bank accounts often aren't. It is hard to find time to get away as a family, and if that time was there, well . . . the money to do so might not be.
It is a choice that we have made.
I have also made the choice that I'm going to be purposeful in including our kids as we go through our days: To let them tag along beside us with our guests during our farm classes, even though it would be much easier on me to send them to a friends house. To plant a couple extra cherry tomatoes plants in the garden, reserved for helping hands to snack from. And to make sure I plan my recipe to have enough pie dough for one last pie, a pie carefully formed by little hands in my small pie dish which I keep around for one purpose only.
Tools of My Trade
Although my particular pastry mat seems to be vintage now, there are many other pastry mats out there, sometimes even found at garage sales. The circles on the mat can be used as a guide for rolling out your dough the right size, but my favorite use for them is to contain my flour mess. Cleaning is so much simpler when you can lift up your mat, dump excess flour into the trash, wash off anything that remains in the sink, and then finish your clean up with just a swipe or two of the dish rag across the table, creating no gummy messes.!

1 comment:
Very sweet. There is nothing I value more than learning to bake from my mother. I think it would be so hard to learn from a book versus being taught by example. I treasure that skill tremendously.
Post a Comment