Follow The Beginning Farmer's Wife on Facebook for additional personal peeks at building a family farm.

(Be sure to click both the Facebook "like" and "follow" buttons to not miss any posts.)

Monday, December 29, 2014

A Christmas Tree Mouse

We don't get out much.

And really, I'm fine admitting it.

And most days, I'm okay with the fact too.

I have learned, however, that there is such a thing as cabin fever.  I have also had times when I have come to the understanding of how those lone prairie wives and moms did have a few breakdowns - or worse.

When you have days on end in a compact house with kids all day (homeschooling days or non), and when some weeks the main time Ethan is around is when he crawls into bed preparing to hop out and leave again bright and early . . . well, you have to get a bit creative to keep your wits for the days.

Through the years on our farm, I do feel like I have become a better "not getting out much" person.  I have looked for ways to make our days enjoyable, especially on those days when there is so much to do that I can't wait to crawl into bed and pretend I don't need to hop right out the next day.

So if you ever are in our house, there might be some curious things going on.  You might think these things are a bit odd, but really they are for sanity sake. 

Like the little mouse hanging right under our star topping the Christmas tree.

This little mouse is a guest in our house. And again, if you are ever in our house, I invite you to look for him.

Our kids know that this mouse likes to travel around the house.  Each of them has a magnet on the fridge, and when they see the mouse has moved, they move their magnet to a designated spot after finding him.

When all of the kids have moved their magnet, the mouse prepares for another move.  Sometimes he only takes an hour.  Sometimes a week.  But unannounced, he does move. When the kids notice, the hunt begins to find where to, and the magnets return to their prior location as they find him again.

Like I said, we don't get out much.  And although I'd be thrilled to be able to squeeze some extra family and friend time in, I am blessed to be able to be at home to support my husband. And I am also so blessed to be at home with my children during these years as they grow and change so quickly, soon to scamper off seemingly unannounced to their next location . . . just like that little mouse.

How about you?  What are some things you do to enjoy and cherish the years at home?

Follow The Beginning Farmer's Wife on Facebook for additional personal peeks at building a family farm.

Tuesday, December 2, 2014

Farmcrafted Soap Giveaway!

That's right! I'm giving away 2 bars of my Crooked Gap Farmcrafted Soap for free! Why?  Because I've been wanting to have a giveaway for all of my online farm friends, and I have just gotten around to doing it. :)
  

A Bit About our Soap
Our natural, fragrance free soap is handmade here on our farm using as many ingredients as possible that are produced on our farm, gathered from local sources, or commonly found available on a farm.

Not only is our soap gentle on all skin types, but it is loaded with glycerine and will leave your skin feeling incredibly soft and moisturized. (More info on our soap can be found on our website, here)

How to Enter the Giveaway

For your chance to win, simply check out the varieties available in my Etsy Shop (also tabbed in this blog's sidebar and on my The Beginning Farmer's Wife Facebook Page), and comment on this Facebook post as to which two varieties you would like shipped or delivered to you. A winner will be picked on Saturday through an internet randomizer. Good luck!

Tuesday, November 25, 2014

Don't Waste that Turkey!

This past Sunday we had our Thanksgiving meal at church.  Ethan volunteered to cook a turkey, and I got ready to can up some turkey and broth.

Although we have yet to raise our own turkeys, I have been canning turkey for at least 7 years according to this blog post.  It almost pains me to see a cooked turkey disposed of without continuing to cook it down to get off the extra meat and to make broth.  There are often so many meals left on a turkey - meat for casseroles and sandwiches and broth for flavoring rice and noodles or for making soup.

When it comes to not wasting our turkey, a bit has changed over the years: We have switched from cooking our turkey in the oven to cooking it in a roaster, from cooking the broth in a pot to just continuing to cook it in that same roaster (You can find my photo tutorial on cooking broth on our CGF recipe blog.), and even my turkey soup recipe has changed from my original recipe.

A few things still remain the same though.  I still get excited when I have stocked my pantry with canned turkey and turkey broth, and Ethan continues to declare his turkey feelings every year.

If you are cooking a turkey this Thanksgiving, I encourage you to not throw out the carcus but instead try making your own turkey broth.  If you don't pressure can (or aren't ready to try out my series of posts on Beginning Pressure Canning), you can always freeze your broth and leftover turkey meat or just go ahead and make a big pot of soup to enjoy. 


CGF Turkey and Vegetable Soup
  • 1 qt turkey broth
  • 1 pt turkey
  • 1/4 cup + 2 T dehydrated carrots (1 1/2 cup fresh or frozen)
  • 1/4 cup +2 T dehydrated green beans (1 1/2 cup fresh or fozen) or 1 pt green beans with juice
  • 1/2 cup frozen or fresh chopped onion
  • 2 cup frozen sweet corn
  • 1 qt canned diced potatoes or 4 cups raw
  • 2 stalks celery chopped
  • 1/4 cup lentils
  • 1/4 cup wild rice
  • 1/2 cup barley
  • 2 tsp salt
  • 1/3 tsp pepper
  • 1/2 tsp garlic
  • 1 bay leaf (remove before serving)

** This recipe is based on the different ways I have preserved my produce.  Ingredients can be substituted, omitted, or additional ingredients added depending on availability and tastes.

Follow The Beginning Farmer's Wife on Facebook for additional personal peeks at building a family farm.

Tools of My Trade


Although a roaster might be hard to find at a garage sale or from an individual no longer needing one, you might be able to snatch one at an estate auction. I placed a 22 qt roaster (vs the 18 quart) on my Christmas list. I use it for multiple projects, and not just ones where I need to heat with it. I can't remember how I functioned with out it! Here is the link to the roaster I own, and I am very happy with it..

Much of what I preserve is pressure canned due to the foods' low acidity in order to kill all bacteria that would cause dangerous food born illnesses. Foods can be safely canned by using the recommended times and pressures given for your altitude. I have a couple older Mirro pressure canners given to me that work wonderfully, and my mom has a newer one that she loves as well. If you do some asking around, you might find someone who has given up canning and has one available, or you can look for one like the one pictured below. It should hold around 9 pint jars or 7 quart jars. This link will take you to my series of posts on Beginning Pressure Canning.

Friday, October 24, 2014

Perserving Peppers

It is October 22nd, and although we have had some light frosts, it hasn't been enough to knock out the garden yet. Because of this, I am still bringing in tomatoes and peppers. which I have been enjoying having this late in the month!

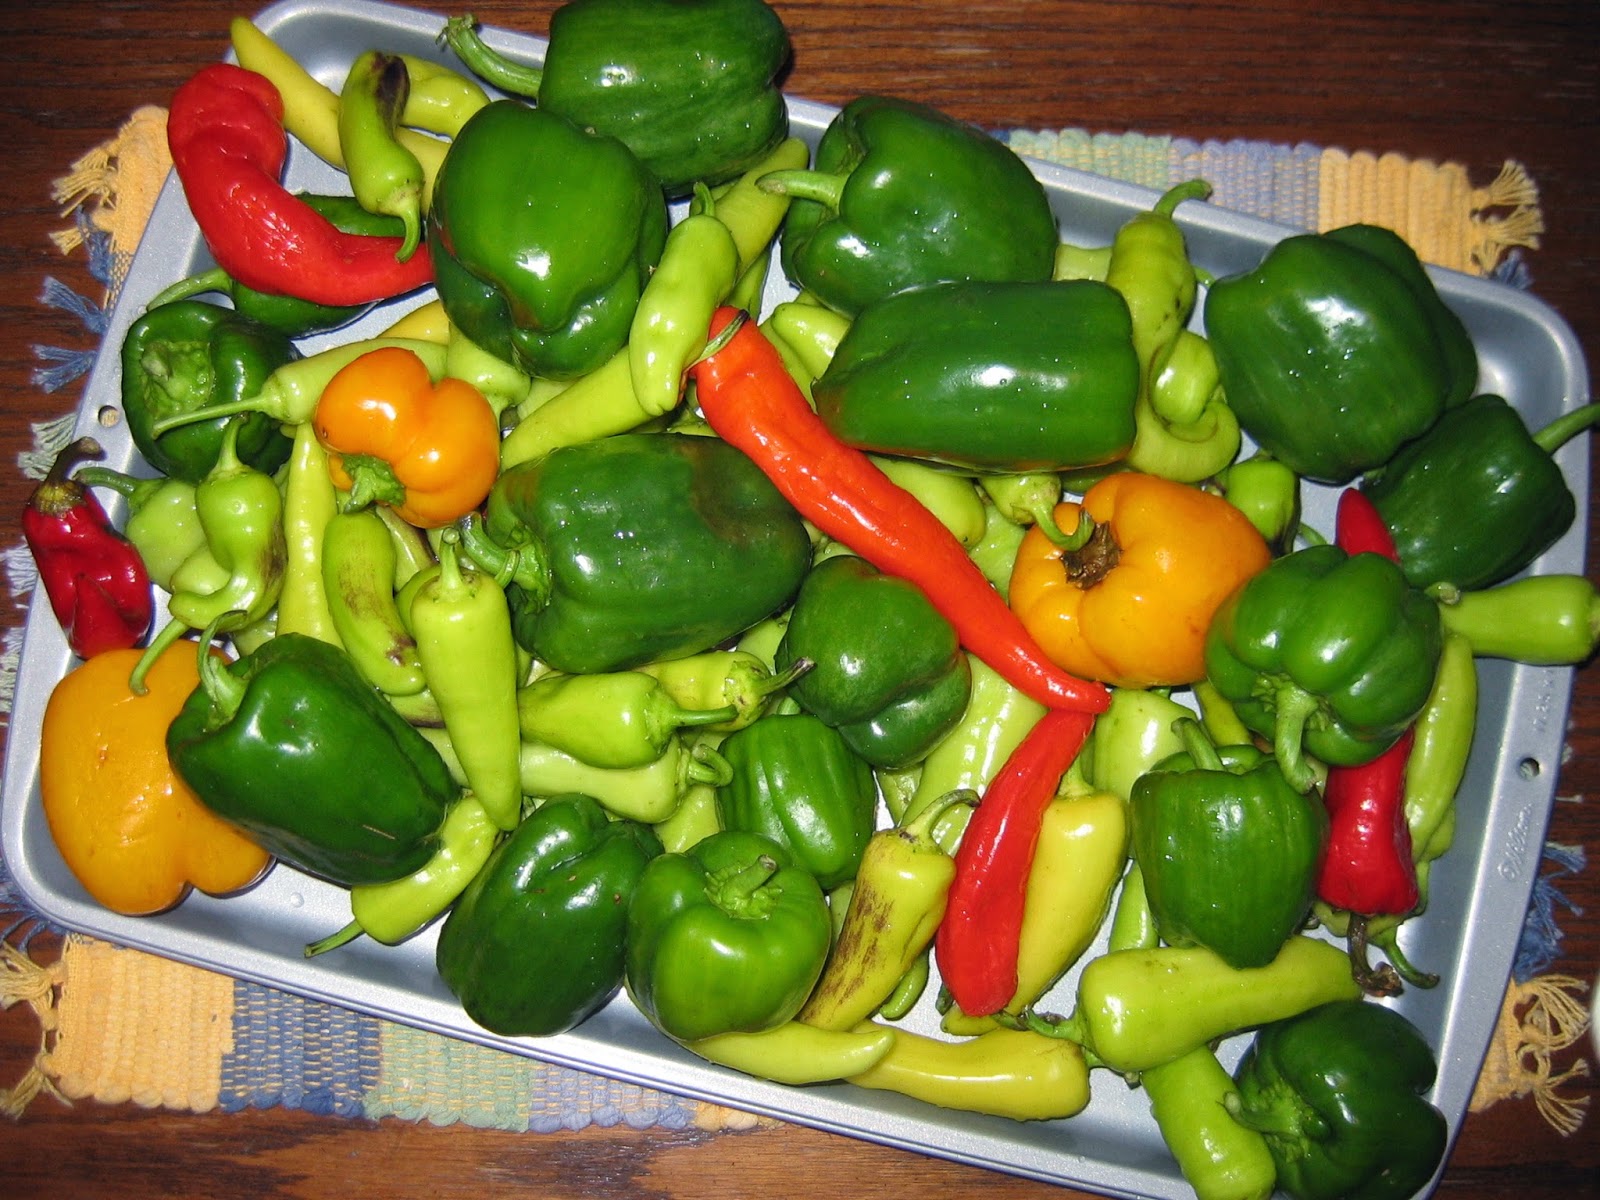
Not too long ago, I brought in a nice batch of peppers to put away for winter use.  This year I am freezing sweet peppers mainly for pizza toppings and pickling banana peppers to put on our sandwiches. 

To start with, I'll give you a glimpse of how I freeze my sweet peppers.  It's really pretty simple.
After washing them up, I cut around the core in order to pull out the seeds.  I then cut them into thirds with the contour of the pepper. I used to dice them up when I froze them fresh. Now I just leave them in their thirds since they are so easy to break or chop into different sizes when frozen.

If you have the time to chop (which I didn't this year), I would suggest blanching them.  If you add this extra step, you will help stop the enzymes that cause the breakdown of nutrients.  To do this, simply chop the peppers into the size you wish to use them as, drop them into boiling water for 2 minutes or steam them until tender, and then cool them in ice water for the same amount of time to stop the cooking process.

Whether blanched or prepared fresh, I then spin the water off of them to help them freeze nicer and bag them up.

My favorite method of bagging things for the freezer is to portion out meal size portions into sandwich baggies and then place these into a gallon zip lock, which I will reuse and redate from year to year. I have found this keeps my foods easy to use, keeps them from being frosted, and is more economical than lots of smaller freezer bags.

And that's that.  I love to pull out sweet peppers for not only our pizza toppings,  but also for casseroles, stir fry, or other dishes!


Another favorite way to preserve peppers is pickling banana peppers.  This is a tad bit more involved, but it is well worth it for me.
After washing these peppers, I prepare them by slicing off the top and stem, running a slit lengthwise down the pepper, and using my finger to slide out the seeds.  The pepper is then cut in rings.  I used to remove the seeds without slicing the pepper so that I would have true rings, but that didn't last many batches after considering the time it took.  If you don't mind your peppers a bit hotter (I prefer as mild as I can get), you can also leave the seeds in.

Here are my peppers, all sliced up.

The next step is to let them soak in a cool salt water bath.  This helps keep your peppers crisp when they are canned. I prepared 12 cups of peppers so I used 1 cup canning salt dissolved in 12 cups of water.

I just combine my salt, water, and pickles in the pot I will be cooking them in, and stick it in the fridge overnight. 

The following day, when I get around to it, I finish preparing them.  I thoroughly rinse and drain my peppers and set them aside while I prepare the rest of the ingredients.  Using the pan they had been soaking in, I combined 2 cups water, 6 cups vinegar, 3 T sugar, and 2 cloves of garlic. I then simmered this for 15 minutes.

Once it was done simmering I discard the garlic cloves, brought the liquid to a boil, and added in the peppers so they could heat before packing them into my jars. 


The jars were packed, the hot liquid was added until 1/4 inch of head space, and lids and rings were put on. Finally, I processed my jars in a boiling water bath for 10 minutes.

And there you have it, pickled peppers to be used throughout the year, a great addition to many sandwiches, as pictured in this post!

The next pepper preserving recipe I would like to try is pepper jelly for our pork chops.  Anyone have a blue ribbon recipe? :)

Follow The Beginning Farmer's Wife on Facebook for additional personal peeks at building a family farm. 

Tools of My Trade


The recipe for my pickled peppers was adapted from this preserving guide, which includes the complete instructions and process as well as many more wonderful recipes! 


This little salad spinner is perfect for spinning water out of peppers and berries for freezing, which greatly improves the quality of the frozen produce.  Not only that, but it is wonderful to spin batches of lettuce from the home garden, helping the lettuce to last longer in the fridge.

Wednesday, October 8, 2014

The Not so Urgencies in Harvesting Garlic

About 10/11 months ago I wrote a post about The Urgencies in Planting Garlic.  I was grateful to not only have the help of my children, but to also have the time together with them.

When spring came, the garlic greens appeared.  As summer progressed, the greens eventually died back.  I knew soon enough that I had missed the prime time to harvest my first ever planting of garlic, but my summer had struck a difficult balance as I was attempting to not overdue things and stay rested with the little one that I am carrying.

Because of this, my garlic continued to rest in the garden soil.

As I have needed garlic this year, I have dug what my recipes call for.  And as the seasons changed to fall, the greens of my garlic reappeared - reminding me just how many bulbs remained from my planting last fall.

Today I headed out to the garden to gather tomatoes and peppers that are tempting the first frost to come. While in the garden, I caught a glimpse of my garlic greens again, tempting me to dig them up.

Although I had decided that my work in the garden was done after the Farm Crawl, to be replaced with a more restful pace and preparation for our little one to arrive in the next few weeks, the call of garlic got the best of me.  So I slowly and carefully dug up my garlic. 

As I mentioned, this was my first attempt at planting garlic.  Because of this, I haven't gathered much knowledge when it comes to garlic growing . . . but I'm guessing that digging garlic when it has started to regrow again isn't the best for flavor or storage.  Even so, I am hoping that it will at least be better than no garlic.

After I dug my garlic, I brought it in the house. There was quite a bit of mud on them so I broke apart the cloves, cleaned them off, and divided them into two piles.  (I'm sure I would have been better off digging them when it was drier and leaving the cloves together - but they they probably never would have been dug. ) The first pile that contained the larger cloves was braided and hung up to dry. The pile with the smaller cloves was put into a breathable produce storage bag in the fridge, in hopes that they can be replanted this fall (maybe after Baby is born??) for some sort of garlic harvest next year (Yeah, I know I'm probably supposed to plant the bigger cloves - but I wanted to use these this year, especially not knowing if I will be able to replant.)

Trial and error is common here on our beginning farm, and with this garlic growing attempt there was probably as much error in my trial as any. I'm sure there are probably garlic experts out there chuckling at me, especially when I have Google at the tip of my fingers telling me what I could do or should have done at this point.  I won't feel offended though if comments are shared to guide me in future garlic growing attempts, and I'd much rather here from my blog friends than from Google anyway. :)

Follow The Beginning Farmer's Wife on Facebook for additional personal peeks at building a family farm.

Saturday, September 20, 2014

Recieve a Free Bar of My Soap!

I realize I've been absent from my blog for awhile.  It's been a full summer with trying to prepare and keep in good health with the new baby coming (less than 2 months now!), along with keeping up with the garden.  Our tiller blew up earlier summer, just about when I was ready to put the mulch down. Because of that, I've been battling weeds by hand - a battle that I've had trouble keeping up with.  Thankfully, we have a new tiller engine in our kitchen, and next year I plan on very little weeding again after a good tilling and layer of mulch!

Another project I've been working on is restocking our Crooked Gap Farmcrafted Soap supply for the upcoming Farm Crawl.  I completely sold out this spring with one of our events, and it has been a slow processes restocking my supply since I'm pretty exhausted after the kids get to bed  - which is my soap making time.  I think I've finally built up a good supply for the Farm Crawl though.

With that said, these two bars are my newest bars, and I am having trouble naming them.  I would love your suggestions, and if I pick a name you suggest, I will mail you a free bar for your help!

The first bar is made with my basic soap recipe, tumeric, and cocoa powder.  The second soap is made with my basic recipe and tumeric powder as well. (I was excited to recently stumble across tumeric as a natural colorant with great benefits.  You can read about it here.)

If you have any great name suggestions, just click on this link to my Facebook post and leave them in the comments.  I'll decide on my final name before the Farm Crawl, this October 5th.

Tuesday, July 29, 2014

County Fair 2014

Early this month was our county fair.

I usually don't get super excited about county or state fair.  I was in 4-H growing up, and I would go to fair just long enough to take my projects, participate in the pet show, and take part in the pie baking contest. One year I did the broiler project - having to raise and process 50 broilers.  One year was enough for that.

I rarely walked through any parts of the fair besides where I needed to go.  I really prefer to stay away from big crowds (unless it's a gathering of people I know or will get to know), and if I have to dodge piles of manure and smell animals, I would rather do that on a farm.

Even so, over the last number of years we have taken a handful of trips to the county fair and almost yearly trips to the state fair. State fair was something Ethan grew up doing with his dad each year, and he dreamed of being a fair kid hanging out with his livestock in the livestock barn.  They made a full day of their trip, checking out all the fair had to offer - minus the food stands as they would retreat for an afternoon lunch at the car. Once we started our family, Ethan became excited about taking our kids. And although I really was not that interested in the fair experience, I did really like spending a day Ethan and the kids.

Now that our oldest has finished 4th grade, however, fair has taken on a new twist since he is also in 4-H.  If you've listened to Ethan's podcast that includes Caleb as a guest, you might have caught that we spent more or less an entire week at the county fair mid July as Caleb took took in his projects and showed sheep, chickens, and rabbits, adding in the daily chores at the fair too. Even though we have made sure that what Caleb takes and shows reflects his work, Ethan can now be a "fair dad" in those barns even though he didn't get to be a "fair kid".

I do have to say, that fair is much more enjoyable when you have someone you know showing things there - especially when it is your kid. And I will admit that I really didn't mind hanging out at fair so much this year, and I did spend quite a bit of time in the livestock barns too.

And to also add a bit more draw for me, I discovered that there is a building previously hidden from me on the fair grounds for open class entries - a place where you can take various homemaking items to be judged for awards. I found out about this last minute, but I was able to dig through my closets and pantry to grab a few things to enter that I had worked on over the year, many of which received placings.

I didn't take a ton of things since I didn't know if my jars would be opened (and unable to be consumed after fair), and I didn't want to spend the money on ingredients for baked goods that we wouldn't get to eat either. Now I know though that jars aren't opened, that garden produce does not have to be fully ripe, and that you also get to take home 3/4 of each baked good once they have been judged. (And that pies go in 2 days after canned goods . . . something good to know so your crust stays nice!)

So here I am, just weeks after the fair, and I'm thinking about what all I can set aside to take to fair next year.  Part of it is because it adds a little excitement to the mundane tasks of my day/year (I would have taken so many more canned goods if I knew they would have remained sealed.), and some of it is that it is fun to get a little bit of premium money which I have picked a purpose for (although there are lots of ways to save money at home, it's a bit harder to generate money.).

Still, I think the best part of county fair is the time spent with my family, and now also seeing our kids enjoy taking part in fair with their interests.

Caleb's Livestock Awards for Sheep, Poultry, and Rabbits

Caleb's Projects and Awards
Hannah's 4-H Clover Kids (K-3rd grade) Projects and Recognitions


Follow The Beginning Farmer's Wife on Facebook for additional personal peeks at building a family farm.
Related Posts Plugin for WordPress, Blogger...